.
We had a little downtime recently and decided to take the moment to set up an in-home product studio. This allowed us to play around with some props and camera settings, and perfect some techniques of the trade. Product photography is not just about the product, but seeing it in action and helping the consumer visualize using the product in everyday life. So it’s important to capture all the elements of a product, like in this case, steam from a teapot, mug, or tea itself.

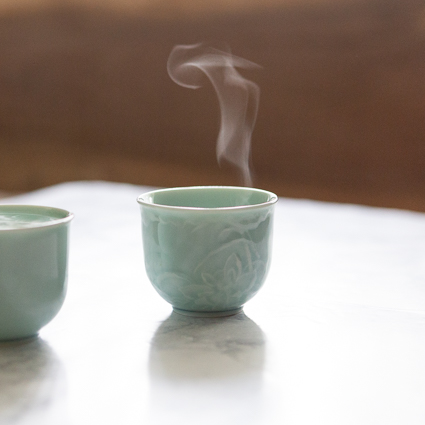
This image is not just about the tea set, but the experience that comes with it.
Steam is one of those things that can be deceptively hard to photograph. But clients often want their food to look piping hot and steamy, and steam is a key component to illustrating anything from hot beverages and tea kettles to steam cleaners and irons. If you know us well, you know we love a good cup of tea, so we played around with our favorite beverage in hopes of capturing some good steam shots before taking an afternoon break. Plus we got to highlight our coveted tea set from our trip to Taiwan in 2009 which is just so pretty. Maybe we’ll share more of that trip some other day.

First things first, to get good steam the water has to be really hot. Like full boil direct from the stove hot. And it doesn’t take long for it to cool down and need refreshing, so efficiency is of utmost importance. We needed our camera ready and our set up exactly as we wanted it. And the point of all of this was to capture the steam as naturally as possible, from an actual beverage, and not using some of the many tricks that food stylists use to mimic a steaming beverage (or whatever). No hot water soaked tampons here! (seriously, it’s a thing).
Although we started out with a black background, we found the best set up to be any dark-ish background and back lighting. The steam just seemed to be thicker and more pronounced.

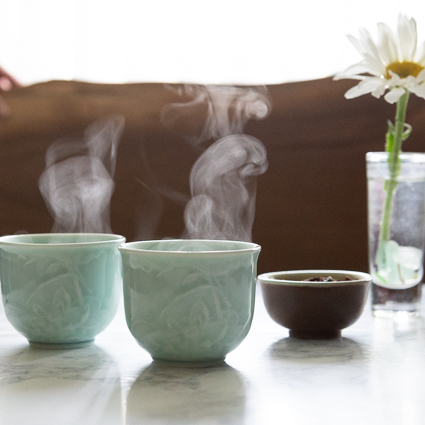
As dreamy as this photo is (in my opinion), the steam gets lost in the light coming from the window.

The black background helps show off the steam.
A dark background plus light from the back was the winner in our book.
Increasing the shutter speed creates a milky smoothness to the steam and really helps show off the swirls. And how do we get those cute little swirls? Patience. And lots of images. It took us over an hour to get these shots, and although we were purposely playing around with different components, it really did take lots of patience to get that perfectly sculpted tower of steam. The slightest movements in the room, and even breathing changed the dance the steam was having. So we just let it dance, snapped away like crazy, refreshed when necessary, and repeated.

Slow shutter speeds created a more wispy steam.

Fast shutter speeds made the steam have more substance.
We had fun playing around a bit, and hope to continue to perfect techniques like these in our little pop-up living room studio so that when we are out on product shoots for our clients, we can get the best shots possible for them.
Also, did you notice our “marble” table top? We are pleased at how authentic our contact paper-covered cardboard turned out on camera. I love a good life hack.

All content copyright Lisa Goshe Photography, 2019